Capture and ml5.js
Opening Examples
Pixelate Video with Microphone Control
Blur Hand Controller Example p5.js sketch
Body Instrument Example p5.js sketch
createCapture()
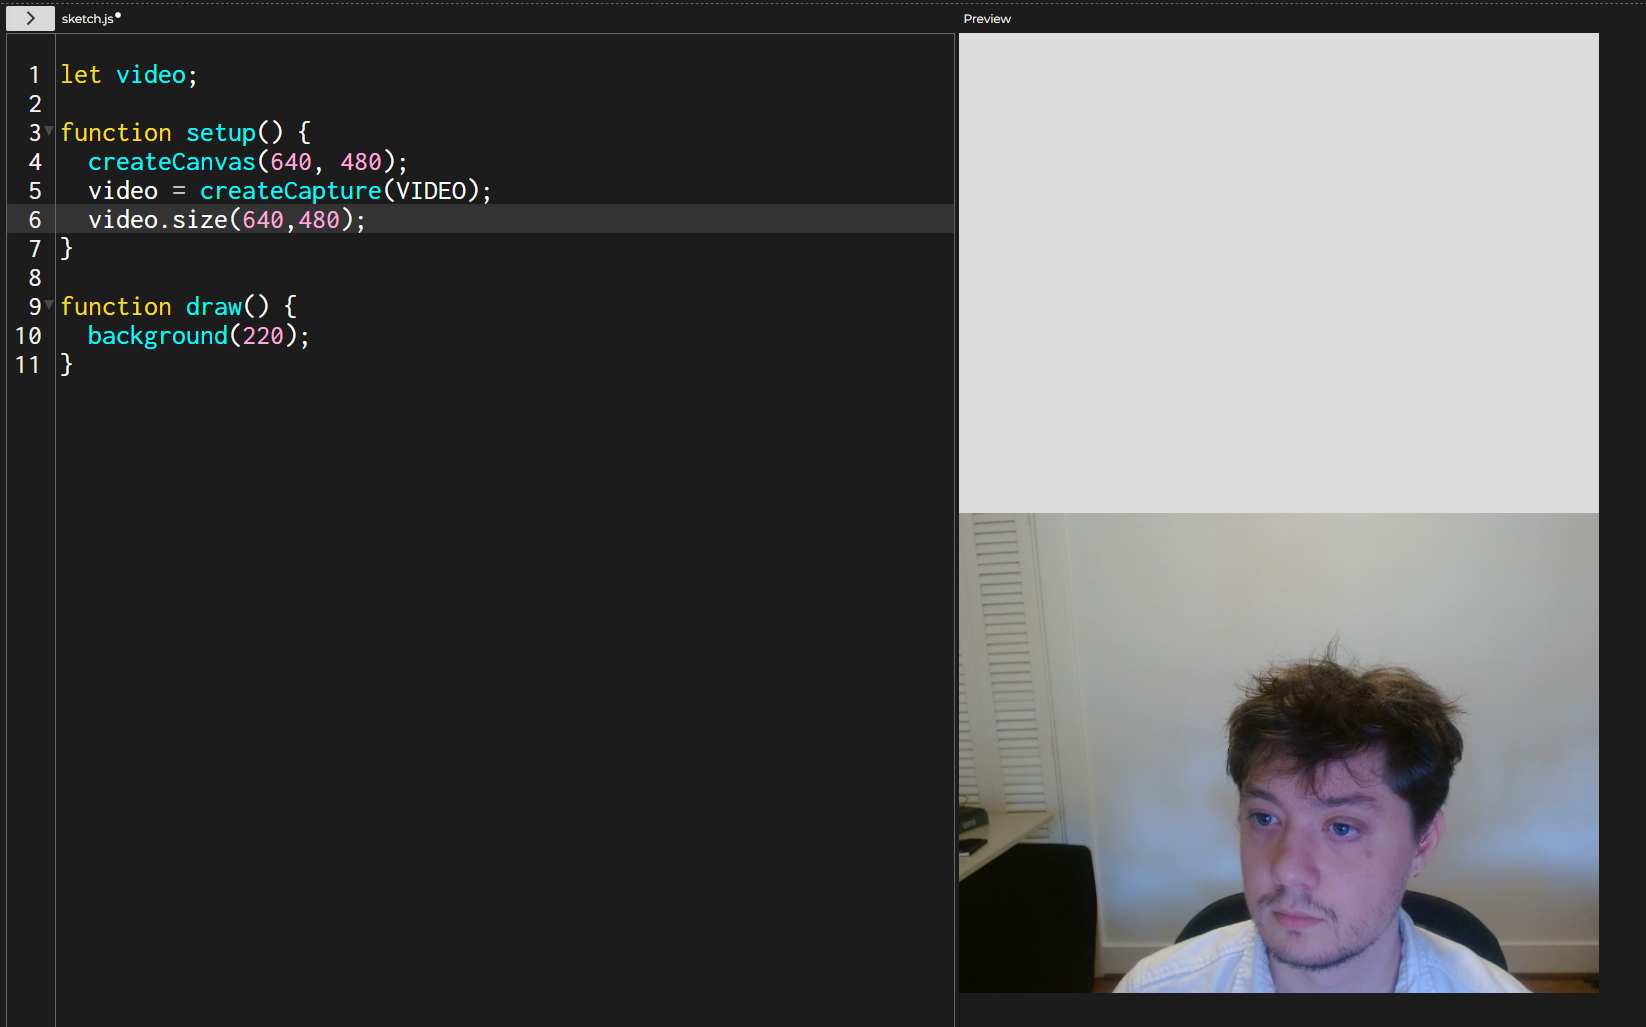
To capture video using a webcam, there are few steps we need to take within p5.js. By default, the createCapture() function will create a video html element. This video element is not drawn on your canvas.
We can create a video element by using the function createCapture() with the parameter VIDEO.
Size
We can additionally set the size of our canvas using the functionvideo.size(). In this example, I set the size of my video to be the same size of my canvas.
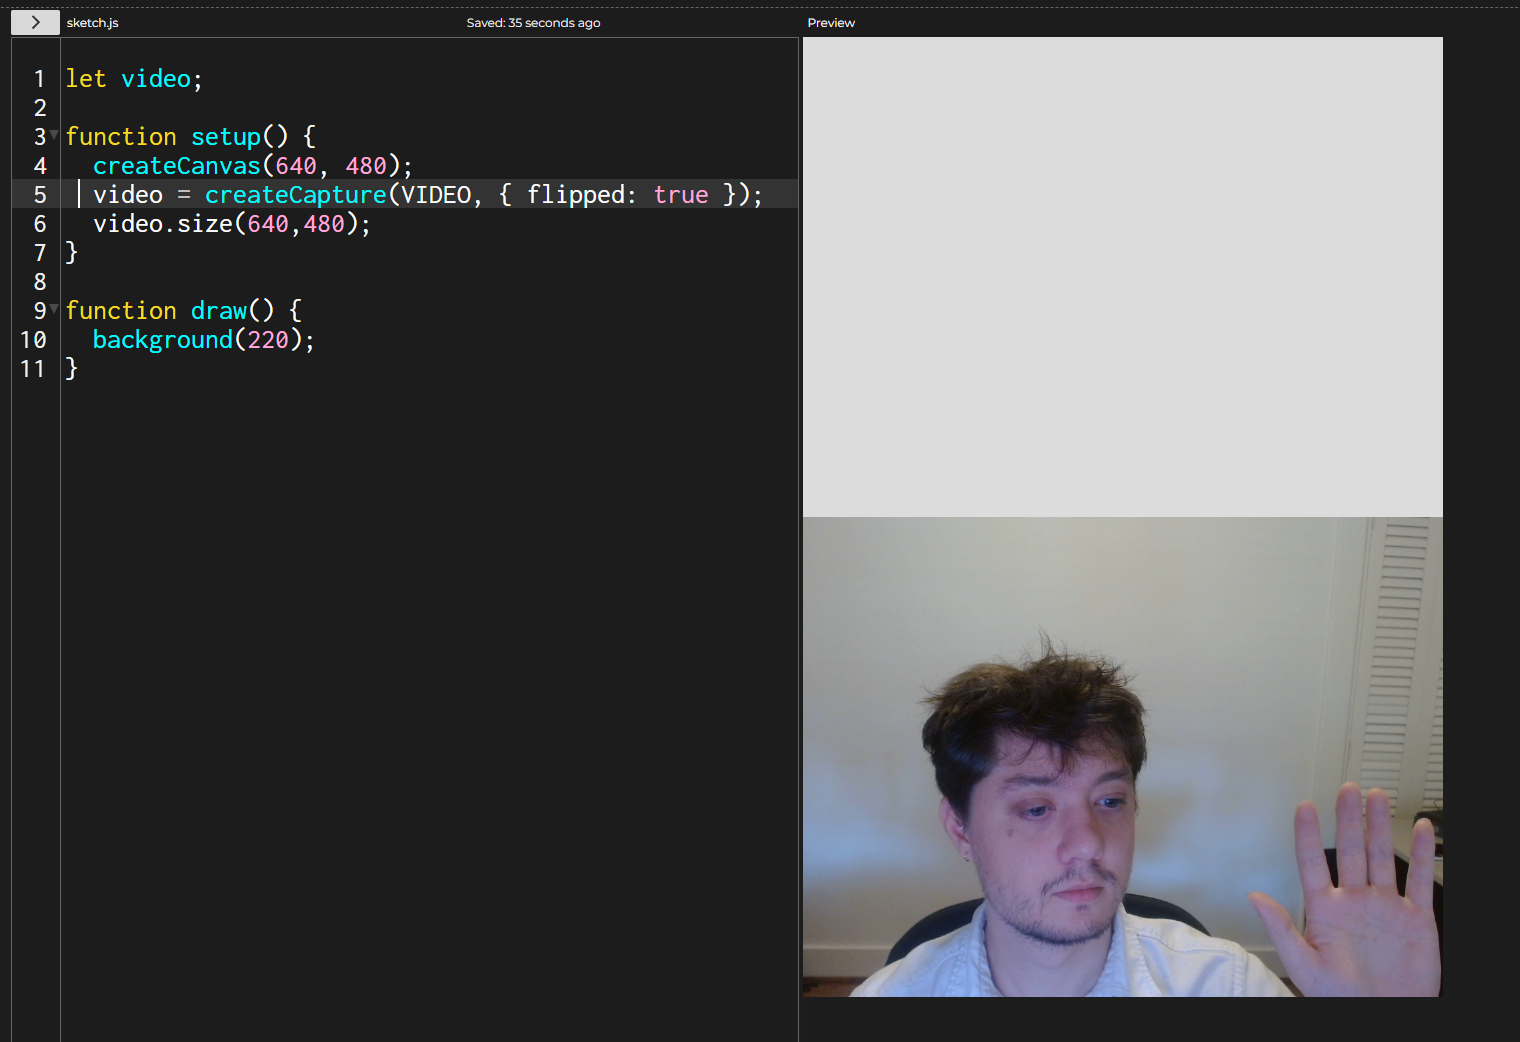
Flip
To flip the our video feed, we can provide createCapture() with the additional parameter of {flipped:true}
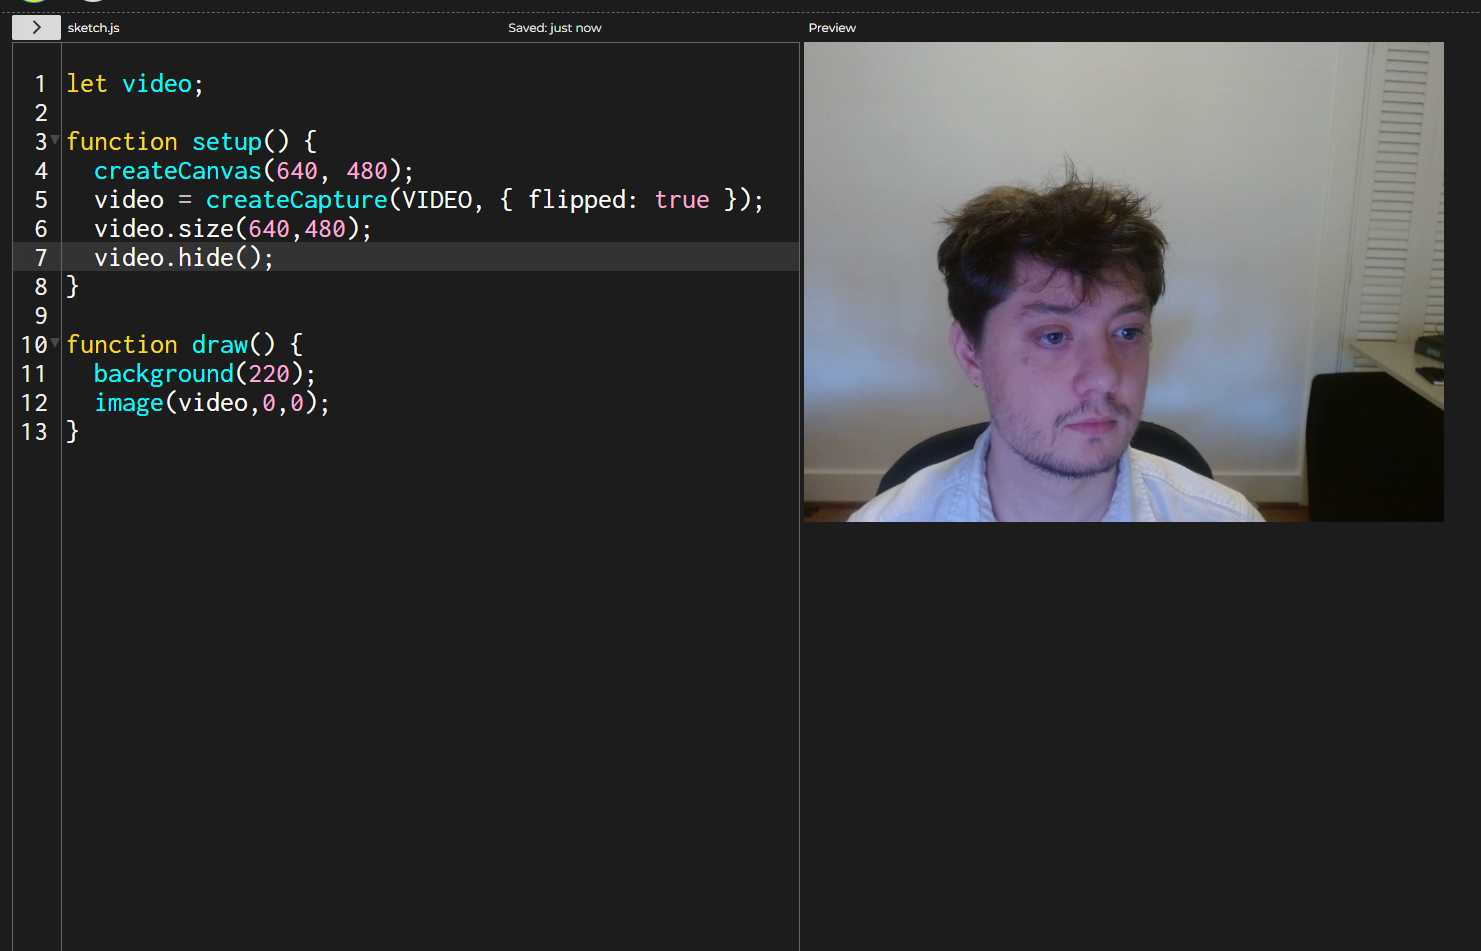
Drawing the video to our canvas
We can hide our video element by using the function video.hide() and draw the video to our canvas using the image() function.
let video;

function setup() {
  createCanvas(640, 480);
  video = createCapture(VIDEO, { flipped: true });
  video.size(640, 480);
  video.hide();
}

function draw() {
  image(video, 0, 0);
}
Filters
Just like with images, we can give our video feed a variety of filters using the filter() function. For example, I can provide my filter function with the parameter BLUR to blur my video feed. I can provide a second parameter to the blur filter that changes radius of the blur filter effect. The filter() function must come after the image we are trying to filter.
let video;

function setup() {
  createCanvas(640, 480);
  video = createCapture(VIDEO, { flipped: true });
  video.size(640,480);
  video.hide();
}

function draw() {
  background(220);
  image(video,0,0);
  filter(BLUR, 20);
}

Iterating Through Pixels
Reference
Within the p5.js library we can get access to the pixel data of a video or image by using the function video.loadPixels(). This will load all the pixels of a video or image. We can then call video.pixels to return an array of all the pixels within our video or image.
We look at all the pixels within our pixels array by using a nested for loop that looks at all the pixels of the width and height of our video. The pixels array is a list of red, green, blue and alpha values for each pixel. The pixel array looks something like this: [pixel0_red, pixel0_green, pixel0_blue, pixel0_alpha, pixel1_red…].
To get access to our pixels, we first need to create a nested for loop that looks through all the pixel positions within our video:
We can find the starting position of each pixel’s red channel in the pixels[] array using the formula (x + y * video.width). This expression counts all the pixels in the previous rows (y * video.width) and adds the number of pixels before the current one in the same row (x). For example, if we’re at pixel position (2, 5) in an image that is 100 by 100 pixels, we would be at the 502nd pixel (2 + 5 * 100 = 502). However, this only represents the pixel’s position in terms of pixel count. Because each pixel is made up of four values (red, green, blue, and alpha) we can multiply this value by 4 to get the corresponding index in the pixels[] array. Thus, the red channel for the pixel at (2, 5) starts at index 2008 (502 * 4 = 2008).
  for (let y = 0; y < video.height; y++) {
    for (let x = 0; x < video.width; x++) {
      let index = (x + y * video.width) * 4;
    }
  }
Once we have the starting red value for our pixel, we can look at this index position within our pixels array:
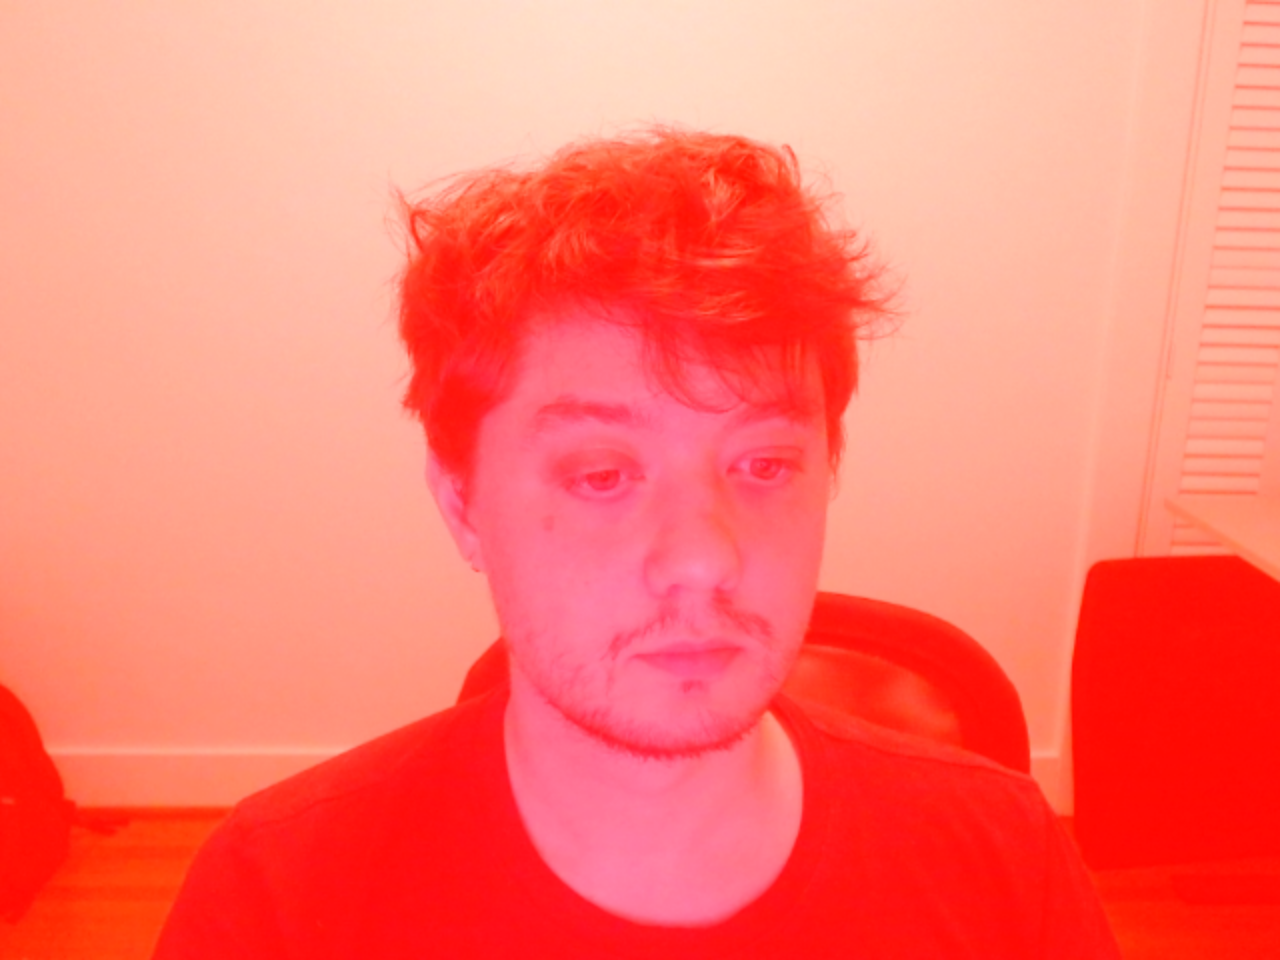
Once I have this value, I can assign a new value. For example, if I wanted to give all of the red values of my pixels a value of 255:
I could then use the function, updatePixels() to update the pixels of my video.
Code
let video;

function setup() {
    createCanvas(640, 480);
    video = createCapture(VIDEO, { flipped: true });
    video.size(640, 480);
    video.hide();
}

function draw() {
    background(0);
    redVideo();
    image(video, 0, 0);
}

function redVideo() {
    video.loadPixels(); // load pixel array

    // Loop through all pixels
    for (let y = 0; y < video.height; y++) {
        for (let x = 0; x < video.width; x++) {
        let index = (x + y * video.width) * 4;

        video.pixels[index] = 255;
        }
    }

    video.updatePixels();
}
I additionally could get access to my Green, Blue and Alpha values by adding 1, 2, and 3 to my index value:
let r = video.pixels[index];
let g = video.pixels[index + 1];
let b = video.pixels[index + 2];
let a = video.pixels[index + 3];
Creating Pixelated Video
Instead of updating our pixels by changing a color value, we could instead create a pixelated effect of our video by drawing a square at (x,y) pixel location with a given amount of spacing, and then look at the r,g,b values of the pixel at a given (x,y) position and assign that as the fill of our square.
function pixelateVideo() {
  video.loadPixels(); // load pixel array

  // Loop through all pixels
  for (let y = 0; y < video.height; y+=spacing) {
    for (let x = 0; x < video.width; x+=spacing) {
      let index = (x + y * video.width) * 4;

        let r = video.pixels[index];
        let g = video.pixels[index + 1];
        let b = video.pixels[index + 2];

        noStroke();
        fill(r,g,b);
        square(x,y,spacing);
    }
  }
}

Code
let video;
let spacing = 20;

function setup() {
    createCanvas(640, 480);
    video = createCapture(VIDEO, { flipped: true });
    video.size(640, 480);
    video.hide();
}

function draw() {
    background(0);
    pixelateVideo();
}

function pixelateVideo() {
    video.loadPixels(); // load pixel array

    // Loop through all pixels
    for (let y = 0; y < video.height; y+=spacing) {
        for (let x = 0; x < video.width; x+=spacing) {
        let index = (x + y * video.width) * 4;

            let r = video.pixels[index];
            let g = video.pixels[index + 1];
            let b = video.pixels[index + 2];

            noStroke();
            fill(r,g,b);
            square(x,y,spacing);
        }
    }
}
ml5.js
ml5.js is an accessible open source library for machine learning. The ml5.js library has a variety of models that easily integrate with p5.js allowing beginning coders and artists to explore the artistic possibilities of machine learning. In this course, we will mainly be focusing on the the body tracking machine-learning models that can be used to track points on hands, faces and body parts.
You can access the documentation and starting guides for the various ml5.js models using the following links:
- Body Pose Model - can be used to track key body parts in real-time.
- HandPose Model - can be used to track parts of hands or multiple pairs of hands in real-time.
- FaceMesh Model - can be used to track key points on the face in real-time.
Each entry will have a step by step guide for how to set up each specific model within your p5.js sketch.